
A Beginners Guide to BASH (Part 2)
-
-
- Navigation
Looking at your current directory
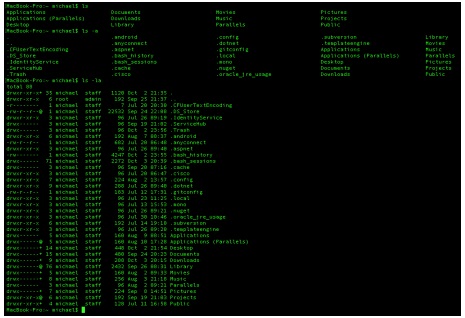
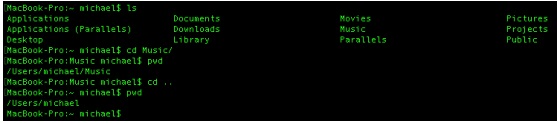
LS : lists all files in the current directory
Some options to know are as follows
LS –a : Lists all files and hidden files in the directory
LS –l : Lists files in long format
Remember that you can use more than one option
LS –la : lists all files and hidden files in long format
Now that we know how to see what’s inside a directory, we can try to navigate to other directory.
CD : will change your directory to the specified folder.
CD .. : go up one folder, could be stacked like CD ../../../ and so on.
CD ~ : go to root folder.
Filenames with spaces will need some special treatment otherwise bash will consider it to be multiple arguments.
CD “File name with space” : using quotes.
CD File\ name\ with\ space : using \ to “escape” the space.
Finally in order to know your current directory name and path from root we user
PWD : prints current working directory
- Input / Output and Redirection with Files
Typing
Echo “Hello World” : will give the output “Hello World”
To redirect the output into a file, we use the “>” and “<” symbol with the arrow pointing to the output file
Echo “Hello World” > OutputFile : now the contents of OutputFile will be “Hello
World”, the > and < overrides the content of the file with the new content, so
to preserve the file content, we use “<<” and “>>”.
Echo “Hello World2” >> OutputFile : will append “Hello World2” to the end of
the file, so now we will have “Hello World” followed by “Hello World2” in the
next line.
Ehco “Hello World” &> OutputFile : will also redirect error messages to the file.
The command ehco is a typo and does not exist. This will print an error
message when we use “>” and “>>” but with “&>” the error message wont be
displayed instead it will be written to the file.To read a file, we use the command :
Cat OutputFile : cat will concatenate and print / show the content of the file
Using the result of a command as the argument of another command will be discussed in part 4 ii and 4 iii. - Managing Files and Directories
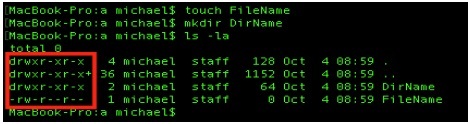
To create a file, we use the touch command.
Touch FileName : creates a file with the name FileName
To create a directory, we use the mkdir command.
mkdir DirName : creates a directory/folder with the name DirName-
- *Permissions and File Types
In the picture above, the left hand side shows an array of 10 characters in the pattern drwxr-xr-x. The first character tells us the type of file. D stands for directory, L for links and – for regular files. The next 9 characters is a repeat of the character R, W and X. R stands for Read, W stands for Write, and X stands
for eXecute. The first RWX is for user, which is the user that owns the file, the second is for users in the files group, and the last is for every other user. When
a “-” character is in place of any character, It means that at that category, that particular permission is not given. For example –RWXR-XR-X the user can read, write and execute, while group and other user can only read and execute the file.
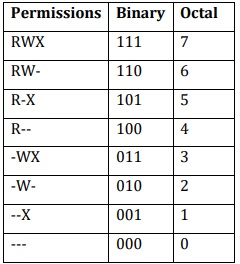
To change permissions of a file, we use the command chmod followed by 3
numbers then the filename.
CHMOD 755 FileName : here RWX is represented by using bits each
number is the octal form of the binary. For example chmod 755 will
give the permission RWXR-XR-X.
-
- *Creating Links and Executables
-
-
- Notice that the file “FileName” created using the touch ommand doesn’t have the execute permission for everyone. To make it executable we can use
-
-
-
- CHMOD +x FileName : this will add X permission for all user
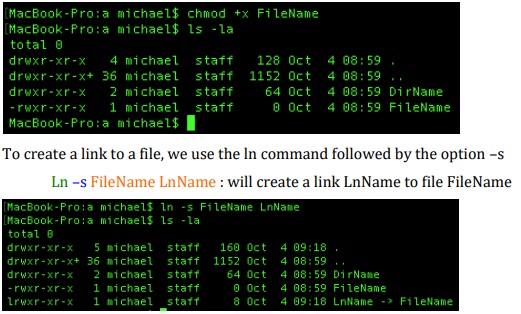
Links could act as a shortcut to files that are hard to access such as network disks. -
- —– Continued in Part 3 ——
Author: Michael Gunawan (1901500111)
Supervisor: Dewi Suryani, S.Kom., M.Eng. (D5878)
-
- Navigation
-